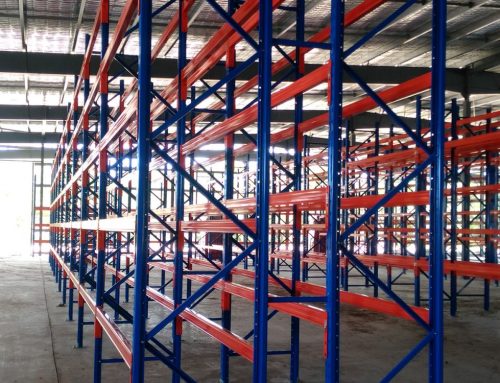
Pallet racks are an important part of any warehouse or storage facility. They provide a stable and secure way to store goods, and they can be customized to fit the specific needs of your business. If you are looking to install a pallet rack system in your warehouse, then this blog post is for you! In it, we will discuss the steps that you need to take to assemble a pallet rack system safely and efficiently.
Know the Pallet Rack System
Before you begin, it is important to have a clear understanding of the parts that make up a pallet rack system. The most basic components are the uprights, which are the vertical posts that support the weight of the racks; the beams, which are horizontal supports that connect the uprights; and the decking, which is what actually holds the goods on the racks. In addition to these basic components, there are also safety clips and bracing systems that can be used to further secure the racks.
Two Main Methods
Now that you know the basics let’s move on to assembly! There are two main methods for assembling pallet racks: bolt-together and welded.
As the name suggests, bolt-together systems are assembled using bolts and nuts. This type of system is typically easier to assemble as it does not require welding or other specialized equipment. Therefore, the bolt-together system is perfect for those who are looking for a quick and easy installation.
- Welded Systems
Welded systems are more permanent, and as such, they are often used in heavy-duty applications. This type of system is more difficult to assemble, but it is also more secure and durable.
If you are unsure which type of system is right for your needs, then we recommend consulting with a professional. They will be able to help you choose the best option for your specific application.

Necessary Parts and Tools
Now that you know the basics of the pallet rack assembly let’s move on to the actual steps involved in putting one together. Before you begin, you will need to gather all of the necessary parts and tools. This includes the uprights, beams, decking, safety clips, and bracing systems (if applicable). You will also need a tape measure, drill, and some basic hand tools.
Steps to Assemble a Pallet Racking System
Now that you have everything you need, it’s time to get started!
First, start by measuring the space where the rack will be installed. This is important because it will determine the size of the uprights that you need. Once you have your measurements, select the appropriate size uprights for your installation. Common upright sizes include 36 inches, 42 inches, and 48 inches.
Next, it’s time to attach the beams to the uprights. The beams are commonly attached using either bolts or welding, depending on the type of system that you are using. If you are using a bolt-together system, then simply line up the holes in the beam with the holes in the upright and secure them together with nuts and bolts. If you are using a welded system, then you will need to use a welder to attach the beams to the uprights. Once all of the beams are in place, you can move on to installing the decking.
The decking is what actually holds the goods on the racks. It is important to choose a material that is durable and able to support the weight of your goods. Common decking materials include wood, wire mesh, and plastic. Again, the method for attaching the decking will depend on the type of system that you are using.
Finally, once the rack is fully assembled, you can add any safety clips or bracing systems that you deem necessary. The common choice is to add safety clips to the beams, but you may also want to add bracing to the uprights if they are particularly tall. Once you have installed the decking, your pallet rack system is complete! Be sure to double-check all of the connections before loading any goods onto the racks.
And that’s it! You have now successfully assembled a pallet rack system. Now that you know how to do it assembling a pallet rack system is easy! Just follow the steps outlined in this blog post, and you’ll have your racks up and running in no time. We hope that this blog post has been helpful. If you have any questions or comments, please feel free to reach out to us. We would be happy to assist you further.


